Lipstick is one of the most powerful tools in makeup. With a single swipe, it can enhance your features, boost confidence, and transform your entire look. But applying lipstick professionally requires more than just picking a shade and gliding it on. Precision, preparation, technique, and product knowledge all play an important role. Whether you’re a beginner or someone looking to refine your technique, this guide will teach you how to apply lipstick like a professional makeup artist.
Why Professional Lipstick Application Matters
Professionally applied lipstick:
- Enhances lip shape and symmetry
- Prevents feathering and smudging
- Makes color last longer
- Complements the overall makeup look
- Photographs beautifully
Poor application, on the other hand, can make lips appear uneven, dry, or messy. The difference lies in preparation and technique.
How to Apply Lipstick Professionally: A Step-by-Step Guide
Step 1: Prep Your Lips Properly
Professional makeup always begins with preparation. Smooth, hydrated lips create the perfect base.
1. Exfoliate
Dead skin causes lipstick to look patchy and flaky.
How to exfoliate:
- Use a gentle lip scrub.
- Or mix sugar with honey and gently massage.
- Use a soft toothbrush to buff lightly.
Exfoliate 1–2 times per week, not daily.
2. Hydrate
Apply a nourishing lip balm and let it absorb for at least 5–10 minutes. Blot off excess before lipstick application. Too much balm can make lipstick slide.
Pro tip: If lips are extremely dry, apply balm at the start of your makeup routine so it has time to absorb.
Step 2: Prime the Lips
Just like the face, lips benefit from priming.
Why Prime?
- Increases longevity
- Smooths texture
- Prevents feathering
- Enhances color payoff
You can use:
- A lip primer
- A small amount of foundation or concealer
Apply a thin layer of concealer over lips and lightly set with translucent powder. This neutralizes natural lip color and helps true lipstick shade show.
Step 3: Choose the Right Lipstick Formula
Professional application begins with choosing the correct formula for the occasion.
1. Matte Lipstick
- Long-lasting
- Intense color
- Requires well-prepped lips
2. Cream Lipstick
- Comfortable
- Slight shine
- Easier to apply
3. Satin Finish
- Balanced between matte and glossy
- Professional and versatile
4. Gloss
- Adds dimension
- Makes lips appear fuller
5. Liquid Lipstick
- Highly pigmented
- Long wear
- Needs precise application
Choose based on event, skin type, and comfort.
Step 4: Define the Lips with Lip Liner
Lip liner is essential for professional results.
Why Use Lip Liner?
- Defines shape
- Prevents bleeding
- Makes lipstick last longer
- Allows slight correction of asymmetry
How to Apply Lip Liner
- Sharpen pencil for precision.
- Start at Cupid’s bow.
- Draw an “X” at the center of upper lip.
- Outline natural lip line.
- Slightly overline only if needed (stay close to natural shape).
- Fill in entire lips lightly to create a base.
Pro tip: Choose liner close to lipstick shade for seamless blending.
Step 5: Apply Lipstick with Professional Technique
There are three main professional methods.
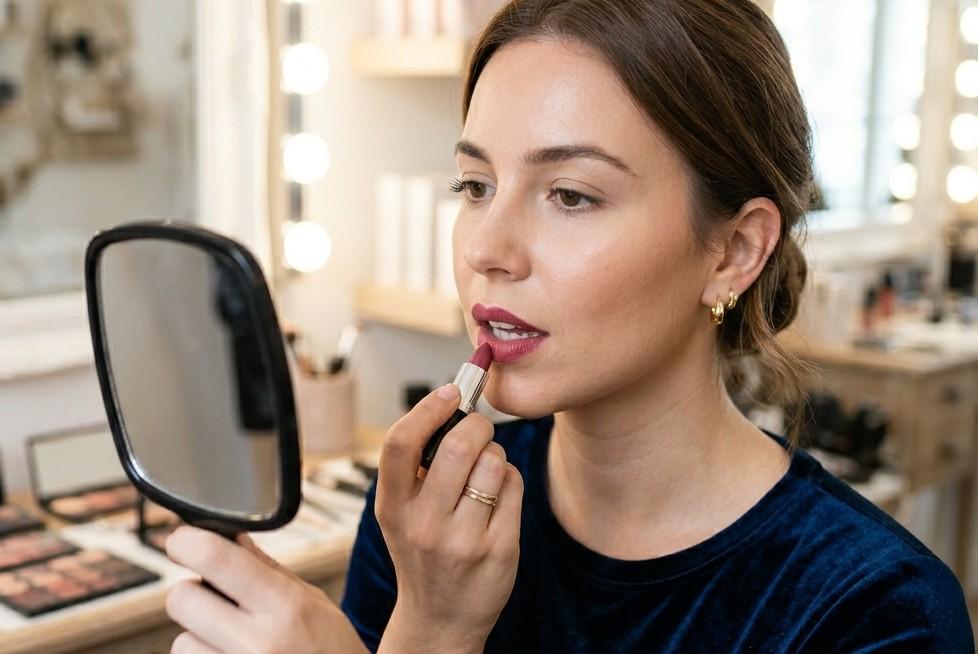
Method 1: Direct from the Bullet
Best for quick application.
- Start at center of lips.
- Move outward toward corners.
- Press lips together lightly.
- Clean edges with concealer brush.
Method 2: Using a Lip Brush (Most Professional)
This method offers precision and control.
Steps:
- Pick product using a lip brush.
- Start from center.
- Work outward carefully.
- Build color gradually.
- Refine edges precisely.
Benefits:
- Cleaner lines
- Better color control
- Ideal for bold shades
Method 3: Liquid Lipstick Application
- Use applicator tip to outline first.
- Fill center.
- Keep lips slightly parted while drying.
- Avoid pressing lips together.
Step 6: Blot and Layer for Longevity
This is a professional secret for long-lasting lipstick.
- Apply first layer.
- Blot with tissue.
- Lightly dust translucent powder through tissue.
- Apply second layer.
This locks color in place without heaviness.
Step 7: Clean and Perfect the Edges
Professional makeup is all about sharp edges.
Use:
- Flat concealer brush
- Small amount of concealer
Clean around lip line for crisp definition.
This technique:
- Makes lips look sharper
- Corrects uneven lines
- Enhances bold colors
Step 8: Add Dimension (Optional but Professional)
To elevate the look:
1. Highlight the Cupid’s Bow
Use subtle highlighter for a lifted effect.
2. Add Gloss to Center
Creates fuller appearance.
3. Slightly Darker Corners
Add deeper shade to outer corners for depth.
These techniques are commonly used in editorial and bridal makeup.
Professional Techniques for Different Lip Shapes
Thin Lips
- Slightly overline center
- Add gloss in middle
- Use lighter shades
Full Lips
- Stay within natural line
- Avoid too much gloss
- Matte finishes look elegant
Uneven Lips
- Balance by adjusting liner
- Correct shape subtly
- Clean edges carefully
Downturned Lips
- Slightly lift outer corners with liner
- Avoid dragging lipstick downward
How to Prevent Lipstick from Bleeding
Feathering can ruin professional results.
Prevention tips:
- Always use lip liner
- Use lip primer
- Set edges with translucent powder
- Avoid overly creamy formulas
- Choose long-wear lipstick
For mature skin, anti-feathering pencils work well.
How to Make Lipstick Last All Day
Professional longevity tips:
- Exfoliate and hydrate properly
- Use liner as base
- Apply thin layers
- Blot between layers
- Avoid oily foods
- Carry lipstick for touch-ups
For events, matte or liquid lipstick performs best.
Lipstick Application for Different Occasions
Office Look
- Neutral tones
- Satin or cream finish
- Clean, soft edges
Bridal Makeup
- Long-wear formula
- Lip liner fully filled in
- Layering technique
- Gloss in center optional
Party Makeup
- Bold colors
- Precise liner
- Defined edges
- Highlighted Cupid’s bow
Photoshoot
- Fully filled liner
- Matte or semi-matte
- Crisp concealed edges
- Slight dimension in center
Common Lipstick Mistakes to Avoid
- Skipping lip prep
- Applying on cracked lips
- Ignoring lip liner
- Over-overlining
- Applying too many thick layers
- Not cleaning edges
- Using wrong undertone shade
Professional makeup is clean and intentional.
Choosing the Right Lipstick Shade
Professional artists consider:
- Skin undertone
- Occasion
- Outfit
- Eye makeup intensity
For Warm Undertones
- Coral
- Peach
- Brick red
For Cool Undertones
- Berry
- Plum
- Blue-based red
For Neutral Undertones
- Most shades work
Test lipstick in natural lighting before finalizing.
Sanitation and Hygiene
Professional application requires hygiene.
- Do not share lipsticks directly
- Use spatula and palette for others
- Sanitize lip brushes
- Avoid applying on infected lips
This is especially important for makeup artists.
How to Fix Lipstick Mistakes
Smudged lipstick:
- Use micellar water on cotton bud.
Uneven line:
- Clean with concealer brush.
Too bright shade:
- Dab foundation lightly to tone down.
Too dark:
- Add lighter shade to center.
Advanced Professional Techniques
Ombre Lips
- Dark liner.
- Lighter lipstick in center.
- Blend edges with brush.
Gradient Lips
- Apply deeper color inside.
- Blend outward softly.
Perfect Red Lip Technique
- Neutralize lips.
- Use matching red liner.
- Apply with brush.
- Clean edges thoroughly.
Red lipstick requires precision.
Tools Every Professional Uses
- Lip brush
- Sharp lip liner
- Translucent powder
- Concealer brush
- Cotton buds
- Tissue paper
- Lip palette
Investing in tools improves application dramatically.
Lipstick for Mature Lips
Professional tips:
- Avoid extremely matte formulas
- Use lip primer
- Choose satin finish
- Define softly
- Avoid very dark shades
Hydration is key.
Lipstick Application Step-by-Step Summary
- Exfoliate
- Hydrate
- Prime
- Line lips
- Fill with liner
- Apply lipstick
- Blot
- Layer
- Clean edges
- Add dimension
Following this structured method ensures professional results every time.
Final Thoughts
Applying lipstick professionally is about precision, preparation, and practice. While it may seem simple, mastering technique transforms an ordinary look into a polished one. With proper lip prep, correct tools, strategic layering, and careful detailing, you can achieve flawless, long-lasting lipstick application that looks refined and elegant.
Whether you are getting ready for work, a wedding, a photoshoot, or a special event, these professional techniques will help you apply lipstick with confidence and perfection. The key is patience, attention to detail, and understanding your unique lip shape and preferences. Practice consistently, and you will notice significant improvement in both application and overall makeup finish.
FAQ’s
Should I apply lip balm before lipstick?
Yes, applying lip balm helps hydrate and smooth the lips. However, always blot off excess balm before applying lipstick to prevent slipping and uneven texture.
Is lip liner necessary for professional lipstick application?
Lip liner is highly recommended. It defines the shape, prevents feathering, and helps lipstick last longer.
How do I fix uneven lipstick edges?
Use a small concealer brush with a bit of concealer to clean and sharpen the lip line.
Should I overline my lips?
Slight overlining can enhance lip shape, but it should stay close to your natural lip line for a realistic and professional finish.
Why does my lipstick look patchy?
Patchiness is usually caused by dry lips or applying too many thick layers. Proper exfoliation and thin, buildable layers solve this issue.
Can I apply lipstick without lip liner?
Yes, but it may not last as long or look as defined. Lip liner improves precision and wear time.
What lipstick finish looks most professional?
Satin and matte finishes generally appear more polished and refined, especially for office or formal settings.
How do I choose the right lipstick shade for my skin tone?
Consider your undertone. Warm undertones suit coral and brick shades, cool undertones suit berry and blue-based reds, and neutral undertones can wear most shades.
How can I make my lips look fuller with lipstick?
Slightly overline the center of the lips, apply a lighter shade or gloss in the middle, and keep the outer corners slightly darker for dimension.
What should I do if my lipstick smudges?
Gently clean the area with a cotton bud dipped in micellar water, then reapply and refine the edges.
Is matte lipstick better than creamy lipstick?
It depends on the occasion and lip condition. Matte lasts longer but can emphasize dryness, while creamy formulas are more comfortable but may need touch-ups.
How often should I exfoliate my lips?
Exfoliate 1–2 times per week. Over-exfoliating can cause irritation and sensitivity.
Can I apply foundation on my lips before lipstick?
Yes, a thin layer of foundation or concealer can neutralize lip color and enhance lipstick longevity and true shade payoff.
How do professionals apply red lipstick perfectly?
They neutralize the lips, use a matching red liner to outline and fill in, apply lipstick with a brush, and clean the edges carefully with concealer.
Why does my lipstick fade from the center first?
The center of the lips experiences more movement from talking and eating. Filling lips completely with liner before lipstick helps reduce this issue.
How do I remove long-lasting lipstick safely?
Use an oil-based makeup remover or micellar water, hold it on the lips for a few seconds, then wipe gently without rubbing harshly.
Also Read: